
My Experience Building a Gas-Fired Kiln for Ceramics
Hello everyone! I recently moved my studio and, with the new space, decided to expand on my old kiln by building a new one from scratch.
The Design
In the post mentioned earlier, I wrote about sizing gas-fired kilns and
used those calculations to size the new kiln.
In short, I wanted a kiln measuring approximately 90 cm ×
90 cm × 90 cm (width × length × height), firing up to cone 6.
Using insulating bricks, I decided on 4 atmospheric
burners.
The roof was the highlight of the design. I departed from the usual arch construction and used Nils Lou’s flat-roof solution, which is simpler to build.
Reading The Kiln Book by Frederick Olsen—and especially the excellent The Art of Firing by Nils Lou—was essential for me. If you are interested in building your own kiln, be sure to read them!
Here are the general kiln drawings:
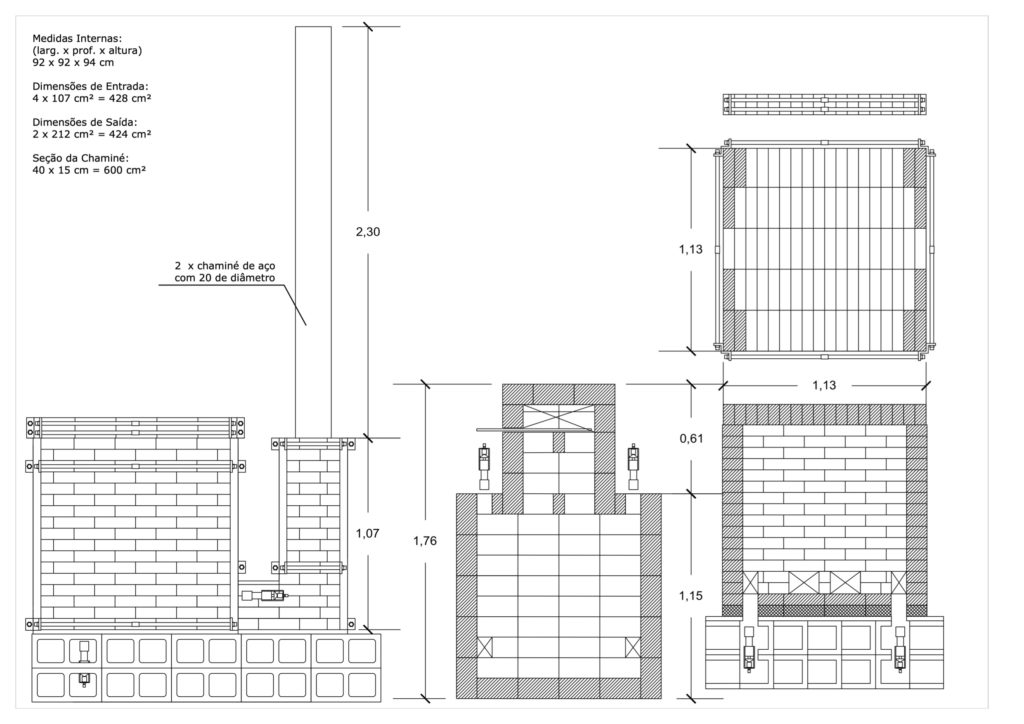
As the drawing shows, I used concrete blocks for the base, with 2 horizontal burners at the back and 2 vertical burners at the front.
I made some changes to the original drawing: the roof bricks were set on end, and I increased the chimney height to 2 metres of brickwork plus 2 metres of 8-inch stainless-steel flue. I also placed the damper horizontally at the chimney outlet.
Angle iron and 3/8-inch threaded rods, tightened firmly with nuts and washers, hold the kiln structure and roof in place.
The Construction
The first step was to level the area and lay the concrete blocks. At this stage, it is important to check that the chimney outlet will not meet a roof rafter.
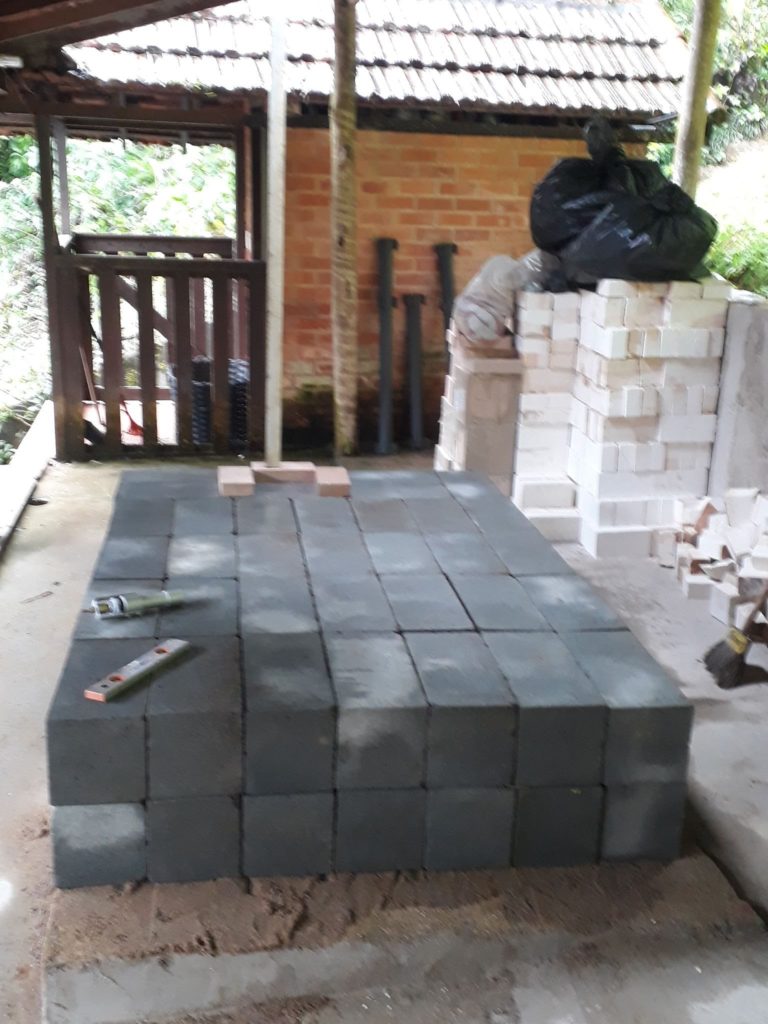
I then began to lay out the kiln’s floor plan with insulating bricks.
For the chimney, I used hard firebricks, which are cheaper and mechanically stronger. I laid them with a thin layer of refractory mortar, since the chimney must have no gaps.
The rest was physical work, requiring careful checks for plumb and square. I also cut the concrete blocks at the front to accommodate the vertical burners.
-
- Stacking the Bricks
-
- Building the Chimney
-
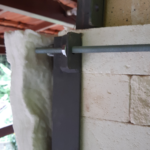
- Installing the Angle Iron
-
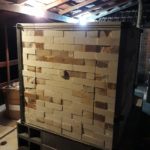
- Completing the Walls
Then came the most demanding and delicate part: installing the roof. As it was very heavy, I decided to lay the bricks in place. I cut an MDF support board and propped it up to carry the bricks. The surface needed to be well supported and level.
-
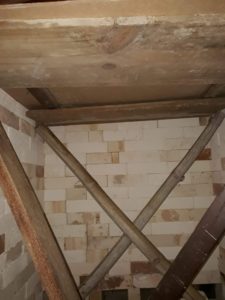
- Inside the kiln, showing the roof supports
-
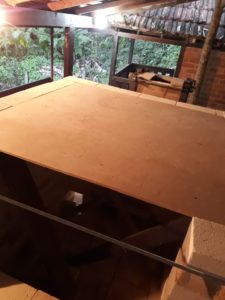
- Support board for the roof bricks
To prevent the bricks from distorting under pressure from the angle iron, I alternated rows in both directions. I used hard firebricks at the corners and a thin layer of refractory mortar on all the bricks. Once they were laid, I installed the angle iron and tightened it firmly with the threaded rods.
-
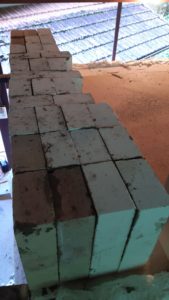
- Assembling the roof bricks
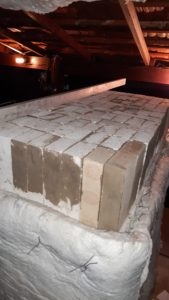
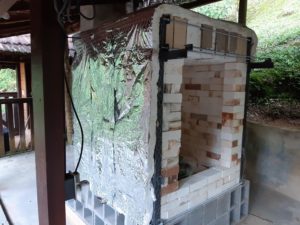
I then wrapped everything in ceramic-fibre blanket and aluminium foil. These layers help insulate the kiln and save fuel.
-
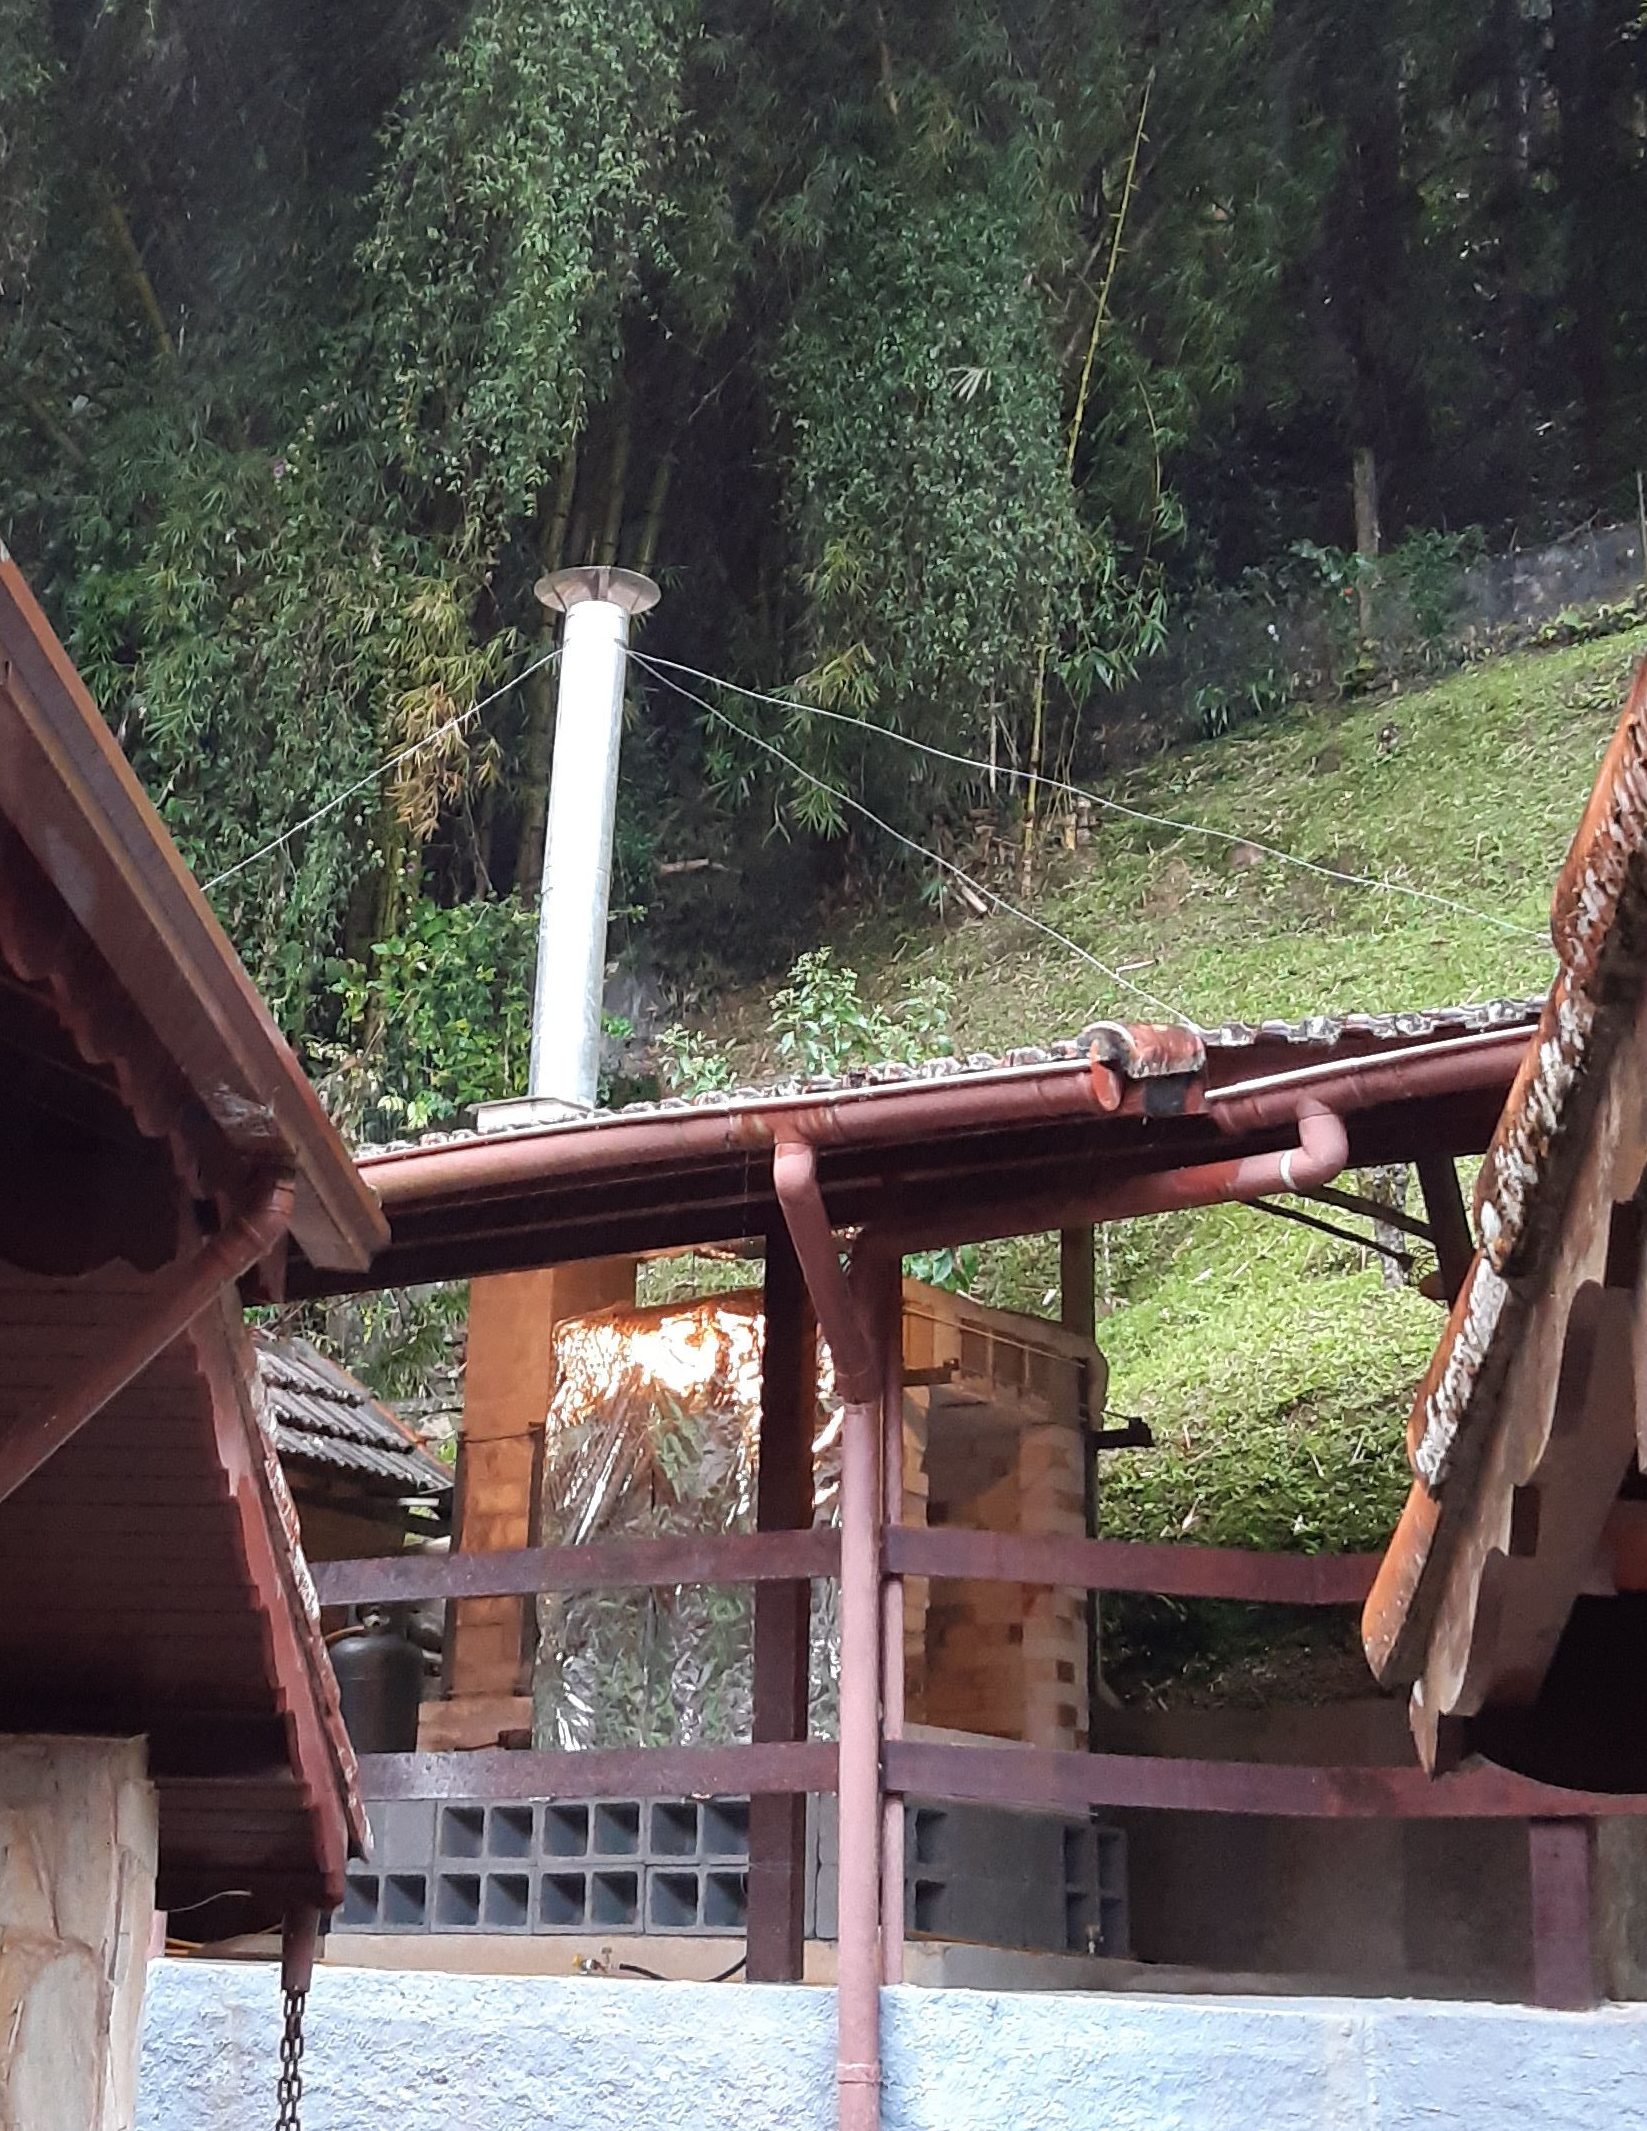
- The Completed Kiln
I left all the gas installation work to a specialist company. I strongly recommend that anyone without experience in this area do the same. Safety first!
Conclusion
I think being a potter is about more than forming a piece. It also involves engaging with different fields of knowledge—chemistry, physics, engineering and so on—which in turn can positively influence creative work.
Building this kiln was a major challenge, but it gave me confidence for future projects and was an invaluable experience.
In future posts I will write more about firing the new kiln.
Until then!
About the Author: Gustavo Assis

Related Posts

Muito interessante. Estou estudando para construir ou comprar um. Não vi porta no projeto. O fechamento será com tijolos?
Muito obrigado pela leitura. Sim, o fechamento é por tijolos.
Voce poderia mostrar a construçao da porta com tijolos?
Olá, eu não tenho fotos do forno fechado mas os tijolos são simplesmente empilhados, formando uma parede e fechando o forno.
Prezado: antes de tudo obrigado por compartilhar sua experiência e o projeto. Se não for incomodar, gostaria de saber como vc colocou os macaricos se não ficaram na horizontal. Como foi a primeira queima? Correu como planejado? Muito agradecido
Olá Antônio, eu fixei com arames os maçaricos nos tijolos para ficarem na vertical. As queimas ocorreram como planejado. Obrigado pela leitura!
Oi. Achei muito bacana seu projeto! Pretendo fazer um e utilizarei o seu como exemplo. Fiquei na dúvida quanto ao teto… Vc utilizou a base de apoio mdf, assentou os tijolos com a argamassa e depois pressionou com as cantoneiras metálicas para fixar?
Correto Carolina. Eu apoiei o teto com mdf e fui assentando os tijolos e depois prendi tudo com as cantoneiras. Obrigado pela leitura!
Muito bom e rico em detalhes. Muito obrigado por compartilhar.
Usarei isso tudo como referência na construção do meu.
Além de empilhar os tijolos na porta vc passa uma massa para fixarem melhor? Um conhecido faz isso e ainda coloca uma manta escorada nos tijolos da porta para não escapar tanto o calor.
Olá, parabéns pela matéria. Você utiliza/sugere a utilização e um termômetro? Onde fixaria? E que tipo de termômetro sugere? Agradeço desde já atenção.
Olá Julio, obrigado pela leitura. Sugiro o uso de um termômetro com saída para termopar tipo K. O local não é tão importante mas evite colocar o termopar perto das chamas do queimador.
Obrigada por compartilhar. Como é o controle de temperatura, termopar? Qual tipo e onde instalou?
Olá Luciana, obrigado pela leitura. Sim, o controle da temperatura se dá pelo termopar tipo K e por um termômetro compatível para esse tipo de termopar. Eu uso o modelo TC4S-14r. Ele foi instalado na parte superior do forno.
Olá.
Como você faz o controle de aumento gradativo da temperatura? É necessário ficar olhando o termostato o tempo todo?
Sim! É necessário olhar sempre no termômetro e também nos cones pirométricos.
Perfeito! Era justamente isso que eu estava procurando. Alguém com muitas informações sobre forno a gás. Vou me dedicar mais para estudar esse assunto. O custo benefício na construção de um forno a gás é bem melhor que o forno elétrico. É fato! Mas o custo com o gás é menor que numa queima no forno elétrico?
Eu penso que o custo é menor ao usar o gás mas você precisa embutir nesse custo o tempo que terá que dedicar à queima, já que na queima. no forno elétrico tudo é automático.
Olá, Gustavo! Gostei muito de sua matéria e me interessou bastante o assunto porque estou estudando essa área de produção de cerâmica. Com seu conhecimento você acha que seria possível construir um forno à gás que também faça uso de resistências?assim ficando um forno “misto” digamos assim. Essa é uma ideia do meu pai, sugerindo economia de gás.
Olá Patrícia, eu não recomendo pois a atmosfera resultante da queima do gás pode atacar as resistências. O que eu já vi e funciona é o uso misto de gás e lenha. Espero ter ajudado!
Excelente sua ideia de forno! Parabéns, Gustavo! Pena eu não ter espaço em minha casa para montar um. O único lugar que tenho em casa é em cima da laje da casa, mas acho que não seria viável para não trazer problemas futuros na estrutura. O que você acha? Um abraço fraterno!
Olá! Que bom que a ideia agradou!
Sobre a laje a preocupação faz todo sentido, mas não é necessariamente um impeditivo.
O ideal seria consultar um engenheiro civil ou arquiteto para uma avaliação. Se não for possível, uma alternativa bacana é pensar num espaço coletivo (um vizinho com quintal, uma horta comunitária, ou até uma associação de bairro). O forno ganha muito quando vira um ponto de encontro!
Um abraço!