
My experience with ash glazes
Hello everyone!
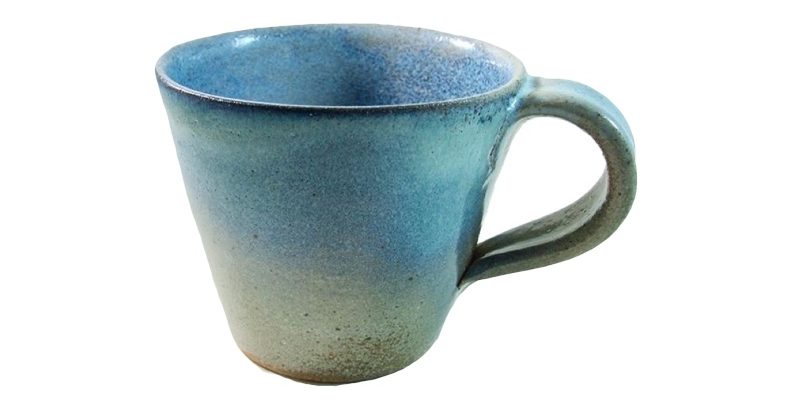
A few months ago, I wrote about ash glazes. Recently, I have had some good results in this area and wanted to share the latest developments with you.
Introduction
Ash glazes are glazes that contain plant ash. They have been used for thousands of years and were probably developed after potters noticed a glassy layer on the surface of wood-fired pieces. As the wood burns, ash settles on the pieces, melts and fuses into a natural glaze. Over time, potters began deliberately adding ash to their usual glaze compositions, developing a wide range of colours and effects.
My experience
I fire a gas kiln in reduction to cone 6. Ash glazes are traditionally fired at much higher temperatures, so my first challenge was to investigate which raw materials would melt at lower temperatures.
I made a tile with several hollows and placed each material in its own hollow.
The feldspar usually paired with ash in glazes did not melt, but albite, a sodium-rich feldspar, gave a good result.
Albite and ash
The next step was to make a table of increasing and decreasing proportions of albite and ash.
| Albite | 80% | 70% | 60% | 50% |
| Ash | 20% | 30% | 40% | 50% |
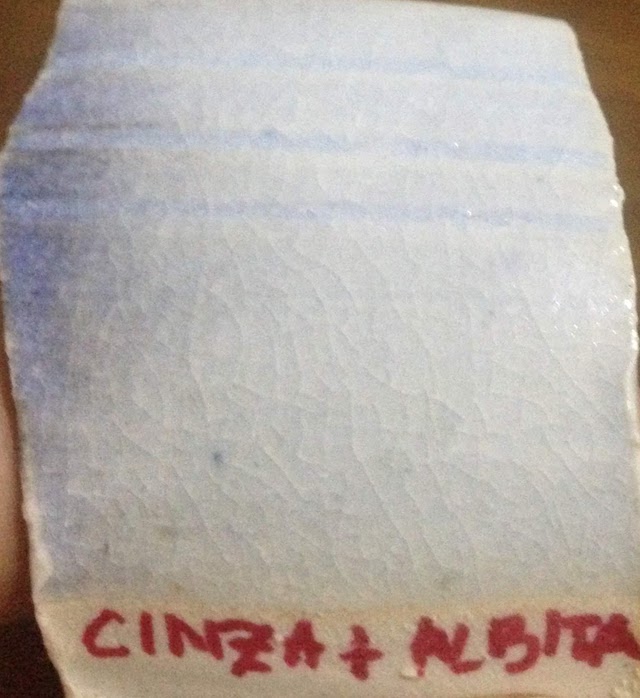
…and so on, until I reached a sample containing 80% ash and 20% albite. The most interesting results came from a composition of 50% albite and 50% ash by weight. I used unwashed palm-leaf ash.
I collect the fallen dry leaves in the studio garden and
burn them slowly in a barbecue so that all the charcoal
turns to ash.
The result
Once I had chosen the proportions, I tried two application methods on
several pieces: spraying and dipping.
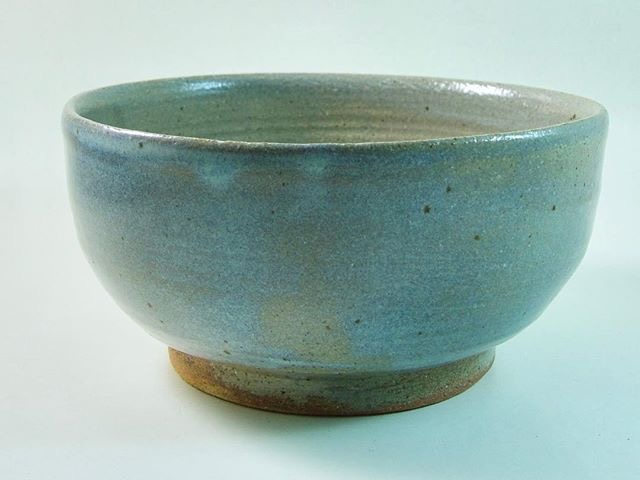
This was the result of dipping:
Here is the result of spraying:
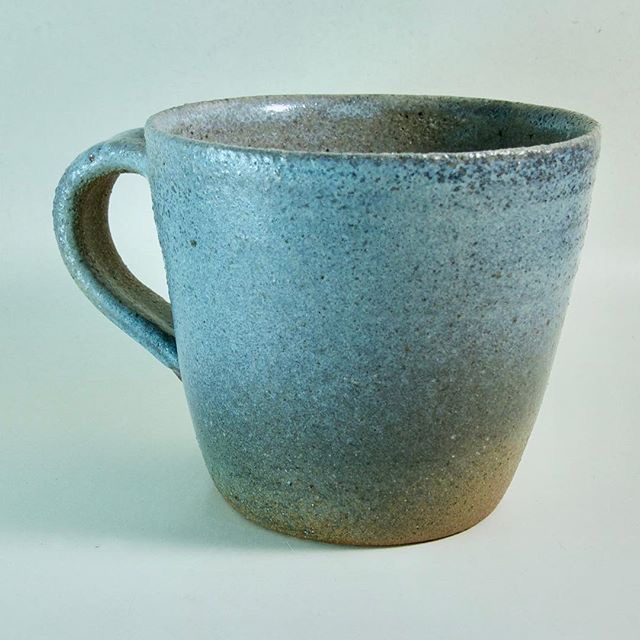
I found the spray-applied result
the most interesting. The piece developed a yellowish tone where the
glaze was thinner and bluish tones where it was thicker.
Making ash glazes for cone 6 is not only possible; it can also produce
very surprising results. I am still at an early stage of the
research, but I am already achieving very satisfying results.
Until the next post!
About the Author: Gustavo Assis

Related Posts

Hello Gustavo,
I was a potter some forty years ago. I visited your site and was enchanted!
It brought back so many memories… Do you teach in your studio?
Or will you keep sharing your discoveries with us potters?
I think I'll look for my stored-away pottery tools and equipment: you've made me want to start again. I'm a 71-year-old woman, and without knowing it you've brought me joy and encouragement.
Hello Mrs Gilda. Thank you very much for reading! I don't teach, but I take great pleasure in sharing my knowledge through this blog. For me, it is extremely rewarding to know that my passion for ceramics has moved you. Your message made me very happy. I wish you a fruitful return and hope ceramics continues to bring you much happiness. I'll be here to help however I can.
Hello Gustavo. Congratulations on both your studio work and the educational work you do on your blog. I'd like to know more about how you made this glaze. Did you apply it to bisque-fired pieces, or did you single-fire? At what stage should I apply glaze for single firing: leather-hard or bone-dry? I'd be very grateful if you could clarify this. All the best!
Hello Rafael! Thank you for reading! I applied it to bisque-fired ware. For single firing, you need to test first. Both methods have advantages and disadvantages. Applying it at the bone-dry stage allows better adhesion between the clay and glaze, but sudden hydration can cause the piece to fall apart. At the leather-hard stage, the glaze may flake off as the clay dries, but the risk of the piece falling apart is reduced.
I loved your account. Thank you very much.
Thank you very much for reading!
Hi Gustavo, wow, thank you so much for sharing your process and discovery :)
I was really curious to see the images in the post, but all the links seem broken. Could you put them back here?!
Many thanks,
Vic
Hi Vic, thank you very much for telling me about the links. I've updated the page and hope you can see the images now. Best wishes!
I loved the result! I'm also developing ash glazes and hope they turn out as well as yours!! Do you know whether the result changes a lot in an electric kiln? Thank you!!
Hello Julia, I know some potters use ash glazes in electric kilns with interesting results. Thank you for reading!
Hello Gustavo. I'm curious: did you achieve that colour by adding oxides or stains? Or is it the natural colour of palm-leaf ash in reduction?
Hello Maria. That colour developed naturally. Best wishes!
Hello Gustavo, I'm loving your tips. I'm a potter and dental technician and know little about glazing.
Your tips are clear, straightforward and easy for me to understand.
I thought this ash firing was beautiful. My kiln is gas-fired, with 2 burners, and I think I can reach about 1200 degrees. I'm also still experimenting.
What temperature do I need for this firing?
Thank you
Domingos Savio
Hello Domingos, thank you for reading! I fired to cone 6. You may be able to achieve it at 1200 degrees. It depends on how much flux there is in the ash.
Good morning Gustavo. I love your generosity in sharing your knowledge. One question: I live in southern Bahia and have access to lots of material for ash, various dry leaves and especially bamboo leaves. Can I make a base glaze with just these two ingredients, albite and ash, adding oxides to vary the colours?
Thank you
Hello Gustavo, thank you for generously sharing such valuable and beautiful content. I'm just starting my first ceramics course and have been looking for information about ash glazes. It's hard to find explanations this clear.
I have a few questions:
Which palm species did you use for the leaf ash? I live on a small rural property and have several types.
Where can I find albite?
Sorry if my questions are very basic…
Thank you!
Hello Eunice, thank you for reading! I mixed leaves from different palm species. You can find albite at suppliers of ceramic raw materials. I hope this helps!
I'm delighted by your work and to know that glazing with ash really is possible… I've done a few experiments but am far from your results… I know the right temperature is essential for a good result… CONGRATULATIONS…
Keep trying! Thank you for reading!
Hello Gustavo, thank you for all the tips.
I'd like one more, please!
Is anything else added for the gloss?
Hello Renalva, thank you for reading. The ash glaze is complete. It already contains all the components that form glass and give it gloss.
Hello Gustavo, congratulations on your beautiful work and thank you for sharing it. How do you prepare the ash glaze for application? Do you simply mix ash and albite with water? In approximately what proportions? Thank you very much.
Thank you very much!
As I live on a small rural property, I'm collecting different ashes: eucalyptus, banana leaves, and next I'll try pine. I want to test how they turn out. I'm following your post.
Thank you, Vera! I hope you get good results!
Hi Gustavo! My boss gave me some wood ash and said I could apply it without mixing it into the glaze. The glazes I have access to are from her studio, so I couldn't change them anyway. Do you know about this way of applying ash? I imagine mixing it with a little water and brushing it on like a pure oxide. If you have experience using wood ash this way, would you recommend any particular glaze or application technique?
Thank you in advance for all the knowledge you've shared! I've just finished a handwritten summary of my glaze theory classes and feel I'm finally understanding this world better.